Convert field values to links
In some cases, it's useful to link custom field values to web pages where calendar visitors can find additional information. For example:
- A museum website that publicizes events at a number of different museum locations might want each location name to serve as a link to that location's home page.

The museum name links to its home page.
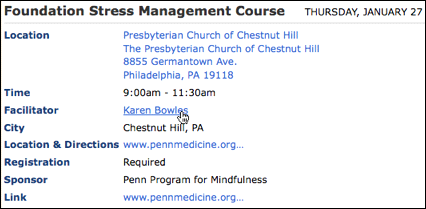
- A health center that offers stress reduction classes might want each class facilitator's name to serve as a link to a page containing biographical information.

The facilitators name links to a page containing biographical information.
How to associate web links with field values
You can associate web links with any list of choices custom field.
I'd like to know more about list of choices fields.
- In the Trumba editing environment, under Tasks, click Define Fields.
Note: If you have an existing field that was created before December 18, 2008 you will need to convert the field to the new enhanced list of choices field in order to apply a custom sort order.
- On the Define Fields page, under the event template to which you want to add the field, click Add Custom Field, and then select Create New Field.
Or, if your account was created before 10/5/2010, click Create a new field.
- On the Create a Custom Field page, for Field name, type a name for the new field.
- For Field type, select List of choices: [create a new list].
- Under Possible choices, click Add Multiple Values. In the text box, type the field values separated by commas, and then click Save Values.
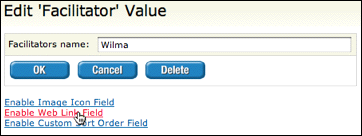
- In the Actions column, click Edit. In the Edit window, click Enable Web Link Field.

Enabling the web link field for a field value.
- For [Field name] web link, type the URL for the webpage that you want the value to link to, and then click OK.
- Repeat steps 6 and 7 for all of the field values with which you want to associate a link.
- Click Done to return to the Trumba editing environment.
- To display the linked custom field in a calendar view, follow the instructions in Event fields and calendar views.
To display the linked field name, select the field's name from the [add new field] drop down list.
